

WEDDING
GUIDE
TABLE OF CONTENTS

01
02
Welcome to Your Wedding Guide!
Your wedding day is about celebrating your love with your favorite people—it’s not about the photos. The photos are there to capture the moments as they unfold, both the planned and the spontaneous, so you can look back and relive it all. My role as your photographer is to document the emotions, details, and interactions that make your wedding uniquely yours.
While I’ll be there to preserve these moments, a little preparation can go a long way in making the experience smooth, enjoyable, and stress-free for you. I’ve designed this guide to help you think through different parts of the day, from getting ready to the reception, with practical tips and insights to help things run seamlessly and look beautiful. It covers everything from timeline suggestions to lighting considerations, family photo organization, and even small details that often go overlooked. Whether you’re having a traditional venue wedding or a backyard celebration, these tips apply to all kinds of weddings.
03
04
How to Use This Guide
READ THROUGH IT
EARLY, TOGETHER
The sooner you review these tips, the more time you’ll have to make intentional decisions rather than last-minute ones.
MAKE NOTES OF
TO-DO LIST ITEMS
While you’re reading through, if you have an idea or an action item note down when that needs to be done and who’s involved.
SHARE IT WITH
KEY PEOPLE
Your planner, coordinator, wedding party, and even family members may find sections helpful for their roles in the day.
USE IT AS A
REFERENCE
You don’t need to memorize everything, but keep it handy when finalizing your schedule and logistics.


At the end of the day, this guide isn’t about creating a rigid structure—it’s about making space for you to fully enjoy your wedding while ensuring the moments that matter are beautifully captured.
So take what’s helpful, adapt it to your needs, and most importantly, when it comes time, savor every moment of your day!

your wedding isn’t about the photos - it’s about the moments that happen, and I’m there to document them.
I’ll guide you when it’s time for portraits, but the rest of the day, I want you to focus on the people around you, not the camera. If you’re nervous, this will help take the pressure off and allow you to be present. More importantly, it’ll create real memories rather than just photos.
SECTION ONE
Getting Ready
Getting Ready

THINGS TO DO
Let the focus of this time be to spend time with your wedding party (and/or those present)! Have brunch together, share a drink, or simply soak in the excitement of the day. The more time you spend together, the more candid moments there will be to capture—but don’t overpack your morning. Leave enough time to enjoy it without stress. Even if it’s not photographed, make it a moment to remember!
Not sure what to do? Ask one or two people in your wedding party to take charge of breakfast or plan a little something special. On my wedding day, my friend (who was also my day-of coordinator) told me, Wake up at this time, and we’ll all have breakfast together. Once we were all seated, she asked each person to share a small encouragement with me—it was the best way to start the morning. You never know what meaningful or fun idea someone might come up with to make your day even more special!

The Getting Ready Space
Keep your getting-ready area as tidy as possible—I’ll be photographing in a documentary style, capturing the real moments. A space with plenty of natural light is ideal, especially for hair and makeup. If possible, set up your beauty station near a window for the best lighting!
What to Wear
Brides, wear a button-up shirt or robe while getting ready to avoid messing up your hair and makeup when changing. Also, consider if you have any preferences for what your wedding party wears while getting ready.


BRIDE REVEAL
Consider doing a first look with your bridesmaids or family members. Even if your people are more of the stoic type, a designated moment for your favourite people is always worth it.
DETAIL SHOTS
If you’d like detailed photos of your wedding attire and accessories,
set aside these items in advance:
FOR THE BRIDE
Invitation (bring two if it’s double-sided)
Rings (engagement ring and wedding band)
Shoes
Veil
Jewelry (necklace, earrings, bracelet)
Textures/fabrics/ items that fit your vibe
Personalized items
Vows
Extra flowers from your florist
Other wedding accessories
FOR THE GROOM
Suit
Ring (wedding band)
Shoes
Tie
Cologne
Watch
Cufflinks
Pocket square
Boutonnière
Consider having a pocket boutonniere! There’s no need for pins and they stay put for the whole day!
Other accessories
Timing (Super Important!)
Brides, ask your hair and makeup artist how long they’ll need for everyone’s services—then add an extra 30 minutes as a buffer. Hair and makeup delays are one of the biggest reasons mornings run late, which can create stress for the rest of the day.
If I’m booked to photograph this part of your day, we’ll schedule my arrival for when hair and makeup should be finishing up, so I can capture those final getting-ready moments without adding any rush.
Before the Wedding Day
Steam/iron dresses (including bridesmaids’ dresses) and suits the day before to avoid last-minute scrambling.
If you want a dress photo, have a nice hanger ready!

Outfit NoteS
Grooms
If your wedding day could be warm, consider bringing a second shirt so you’re not stuck in a sweaty one all day.
Dresses
For both bride and bridesmaids, choose dresses that are comfortable and secure. If your dress requires tape or constant adjusting, it may be frustrating throughout the day, so practice applying tape with your helper beforehand and time how long it takes to ensure a smooth getting-ready process.
Shoes
Brides, if your shoes are beautiful but uncomfortable, bring a backup pair of comfy flats to slip into after photos. Most dresses will cover them anyway!
SECTION TWO
THE CEREMONY
THE CEREMONY
Think about what would make your ceremony feel meaningful to you—this could be certain words, music, or including special people. Are there any cultural or religious traditions you or your family want to incorporate?
Your officiant will walk you through the flow, but if you’re looking for a natural rhythm, I’d suggest:
vows → signing → first kiss → straight into celebrating down the aisle
This keeps the momentum going and feels seamless! You also have the option to sign the papers after the ceremony with your witnesses and officiant instead of making it part of the ceremony itself.
Here’s a general ceremony timeline to consider:
Doors Open
Processional
Who’s walking down the aisle?
Music/Worship + Message
Traditional + Personal Vows
Ring Exchange + Signing
(or sign after the ceremony!)
First Kiss + Recessional
Here’s a general ceremony timeline to consider:
Doors Open
Processional
(Who’s walking down the aisle?)Music/Worship + Message
Traditional + Personal Vows
Ring Exchange + Signing
(or sign after the ceremony!)First Kiss + Recessional

Doors Open
Think about when guests will start arriving and when they’ll be allowed into the ceremony space. This is usually about 30 minutes before the ceremony, but if you know your guests tend to run late, you might want to tweak the timing on the invitation.

Photos of Empty Ceremony Space
If you’ve put time and effort into your ceremony setup and want photos before guests arrive, make sure everything is decorated at least 30 minutes before doors open. That way, I can capture it looking its best before people start filling in. Just be sure to communicate this with whoever is in charge of setup!

Vows
If you’re doing personal vows, write your vows on paper, not a phone — it looks much more timeless in photos.
Also, don’t leave this to the last minute (I made that mistake myself!). Start writing now and aim to finish at least a month before the wedding so you’re not stressing over it the morning of.


First Kiss
Ask the officiant to step aside before announcing the first kiss (I’ll remind them on the day).
Hold the kiss for two to three seconds — just longer than a quick peck — to ensure a great photo!

Post-Ceremony
The time right after your ceremony is probably the most energy-filled moment of the day—your guests just saw you get married, and you’re officially married!!
If your venue has the space, taking 30 minutes to soak it all in and chat with guests makes for some of the best candids. If you don’t get to everyone, don’t worry—you’ll have more time later!
Exit
Do you want to have a fun ceremony exit? If you’re switching venues from the ceremony to reception and don’t plan on having a grand exit at the reception, consider having one here!
Some ideas I love that look great in photos during the day are rice and flower petals. You could even do this to end the ceremony during the recession.
Set-Up
When arranging the ceremony space, make sure there’s enough room for me to move to the front from both sides—not just down the aisle. This allows me to capture a variety of angles, including both of you at the altar, without being disruptive.
A wider aisle helps keep photos looking clean and uncluttered, and if you have the option, a longer aisle is better than a short one—it makes for a more dramatic entrance. Also allows more time to get the bride walking down the aisle and people’s reactions!
If possible, leave at least 3 feet between you and the first row of guests. This creates a cleaner composition and allows me to capture more intimate shots without obstruction.

Placement
Ensure there’s space between you and your wedding party. This also ensures that during your ceremony and first kiss, the focus is entirely on you two—without wedding party members crowding the frame.
If you have an altar, mark where everyone should stand. This helps center you properly and lets the officiant know where to position themselves.
Rain Plan
If there’s a chance of rain on your wedding day, have a backup plan.
It’s always better to have one and not need it than to scramble last-minute if the weather changes.
Wedding Party
If your wedding party is standing up with you, remind them they’ll be in the photos — so they may want to look happy and engaged!
After walking back down the aisle, do you want to stop and kiss in the middle or at the very end? Let me know!
SECTION THREE

First Look
First Look

If you’ve read my blog “How to Schedule Your Wedding Timeline”, you already know the pros and cons of a first look. One extra tip: Since most of your portraits will happen before the ceremony, don’t forget to bring your wedding bands, bouquet, and boutonniere.
And if either of you feels pressure to have a big reaction — don’t. The first look is more about the time you get to spend together than the reaction itself.
SECTION FOUR
Couple Portraits
Couple Portraits

A reminder: The focus isn’t on the photos. It's the time you have together on your wedding day. I’ll guide you when needed, but the best thing you can do is soak in the moment of just getting married.
Focus on each other, add some movement, chat about how you’re feeling and what you're excited for! I’ll give some direction, but otherwise pretend I’m not there.
SECTION FIVE
Where to Take Portraits
Where to Take Portraits

I’ll make suggestions, but ultimately, I want the location to reflect what feels right for you. Here are some options:
At your venue, if it has great spots.
A nearby location, especially if you’re open to a quick drive.
If you’re doing a first look, we can explore a further location without taking too much time away from guests.
For family photos, a convenient spot at your ceremony or reception venue works best—bonus points if there are stairs for large groups!
SECTION SIX

Family Photos
Family Photos

The Importance
It can be tempting to rush through the family photos, and every family has a different dynamic, but if this is the only time you have scheduled with your family let’s make it memorable.
There will be a shotlist, but the focus doesn’t have to be on photos. I’ll photograph you with your people when you’re ready. If ya wanna chat a bit and crack some jokes or have very candid photos with your family, let’s chat about what this means to you and make it happen.
Outfits
Do you want your family to have a coordinated look or a specific color palette?
If so, it’s a good idea to communicate this to them well in advance!
Point Person
Choose one person per side (bride’s side and groom’s side) who knows everyone in the family photos. This person will help call out names and make sure everyone is present—so you don’t have to! This also ensures that no one gets missed, especially if I haven’t met them before.
Communication
Let everyone who’s in the family photos know when and where they need to be ready. If someone essential (like a parent) isn’t there on time, it can delay the day or even cause certain photos to be missed. A quick heads-up before the wedding day and a reminder on the day can prevent unnecessary stress!

Shot List
Create a list of the group photos you’d like, organizing it by family name with the individual names in parentheses. Also, specify which photos you’d like with both of you and which should be just one side of the family.
Here’s an example of how to structure it for clarity:
V + D + Hsu Family (Lidia, Henry, Nicole, Drew, and Finn)
V + Hsu Family (Lidia and Henry, Nicole) (w/o spouses and kids)
V + D + Val’s Parents (Lidia and Henry)
V + Val’s Parents (Lidia and Henry)
V + Siblings (Nicole)
V + D + Siblings + Spouses + Kids (Nicole, Drew, and Finn)
Repeat the same format for the groom’s side and any additional family groups.
For efficiency, start with the largest group first, then gradually break it down into smaller ones. This makes the process smoother and quicker!

Posing
For the best-looking photos:
Stand close together with your inside arms around your spouse (bride and groom).
Brides, hold your bouquet with your outside hand.
Grooms, place your outside hand in your pocket for a relaxed look.
Guests should angle slightly toward you, showing one shoulder forward, with their inside arm tucked behind to create a natural flow.
I’ll first take natural, candid shots and then fine-tune the poses to make sure everyone looks great. If you prefer only candid photos, just let me know!
SECTION SEVEN
COCKTAIL HOUR
COCKTAIL HOUR

How long should this be?
If you’re planning to do a first look, this means by the time the cocktail hour comes you’ll already have done couple portraits and photos with your wedding party. If not, while your guests enjoy the cocktail hour, we’ll be photographing you in your post-ceremony feels!! This answer is dependent on your day and locations for photos. We can chat about this, but I’ll always suggest making time to join the cocktail hour and mingle with your guests!
What’s the benefit of your cocktail hour?
This gives your guests something to do in between the ceremony and reception, especially if dinner is on the later side. It gets your guests mingling and allows you more time with your guests. Having drinks, snacks, and lawn games or interactive activities like signing a guest book or taking polaroids is a good time for this to happen and gives your guests things to enjoy and do in the meantime.

SECTION EIGHT

the ReCEPTION
the ReCEPTION
Timeline
If you’re wondering what to include here are key events to consider:
Doors Open
Grand Entrance + Announcements
Dinner
I recommend asking your caterer how long they need for the amount of guests you have!
Speeches + Thank You Speech
Cake Cutting/Dessert
Golden Hour Photos
Check what time the sun sets on your wedding date. If the sun is out, we can sneak away for 10-15 minutes before sunset for portraits in soft, warm light.
The best time to do this is when guests are occupied (like during dinner), rather than when the dance floor is in full swing—people tend to follow the couple, and we don’t want to empty out the party!
Parent Dances
First Dance
If you have an upbeat song, consider doing this during your grand entrance to keep the energy high.
If it’s a slow song, having it after the parent dances (if any) creates a nice flow.
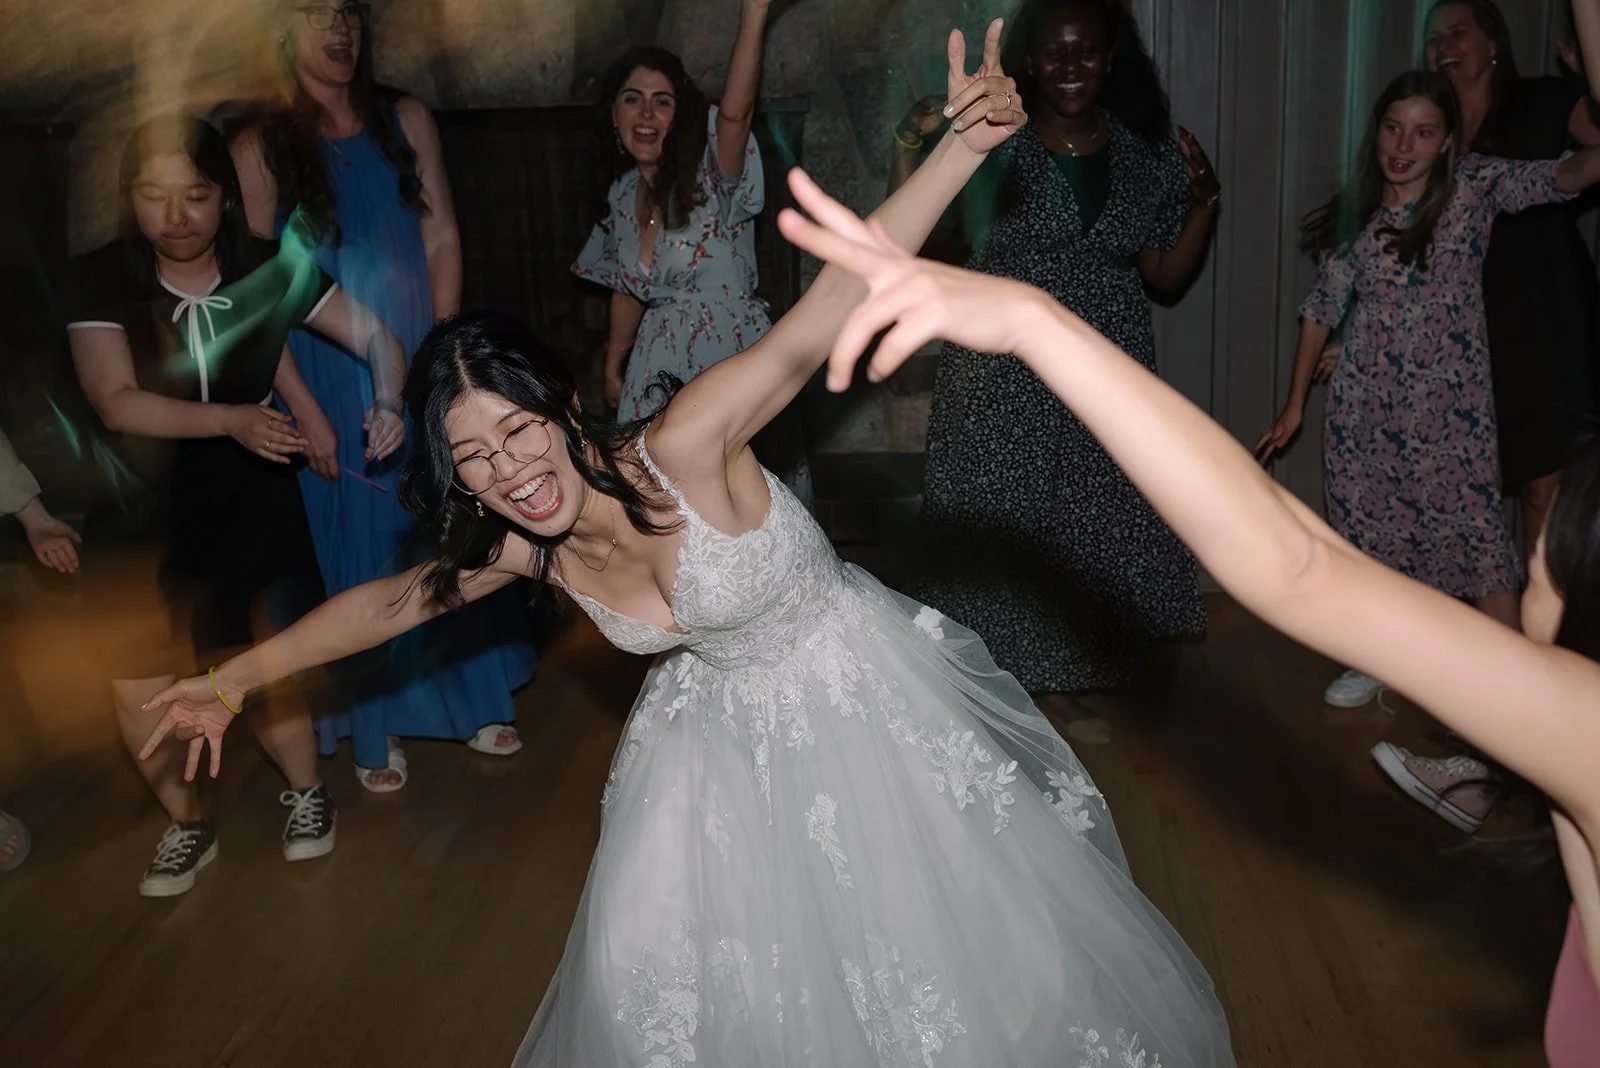
Dance Party!

Speeches
While having speeches during dinner may seem efficient, it can limit the chance for great candid moments. No one wants a photo mid-bite with a mouthful of food!
Keep speeches concise. Let speakers know they should aim for five minutes max—some may go over, but this helps keep things engaging and prevents an extended childhood-memory recap session.
If a speech-giver plans a surprise that involves moving around instead of staying at the podium, ask them to let me and the videographer (if applicable) know in advance so we can position ourselves properly and adjust lighting if needed.
4-6 speeches (including a thank-you speech from you, if you choose) is the sweet spot.
If someone is nervous about public speaking and it might affect their enjoyment of the day, consider giving them space to speak at the rehearsal dinner instead!
Thank You Speech – This is typically the final speech of the night, given by you as a couple. It’s a chance to thank your guests, acknowledge vendors, and give a shout-out to those who traveled. You can also announce what’s next (e.g., “The venue is open until midnight—enjoy the open bar and dance the night away!”).
Ice Breakers
Including an interactive moment—whether it’s a fun game, a group activity, or something unique to your wedding—keeps guests engaged and creates opportunities for fantastic candid photos.
Dancing
Dance together! Even if it’s just for a song or two, it guarantees you’ll have fun, joyful dance floor photos together at the best party of your lives!
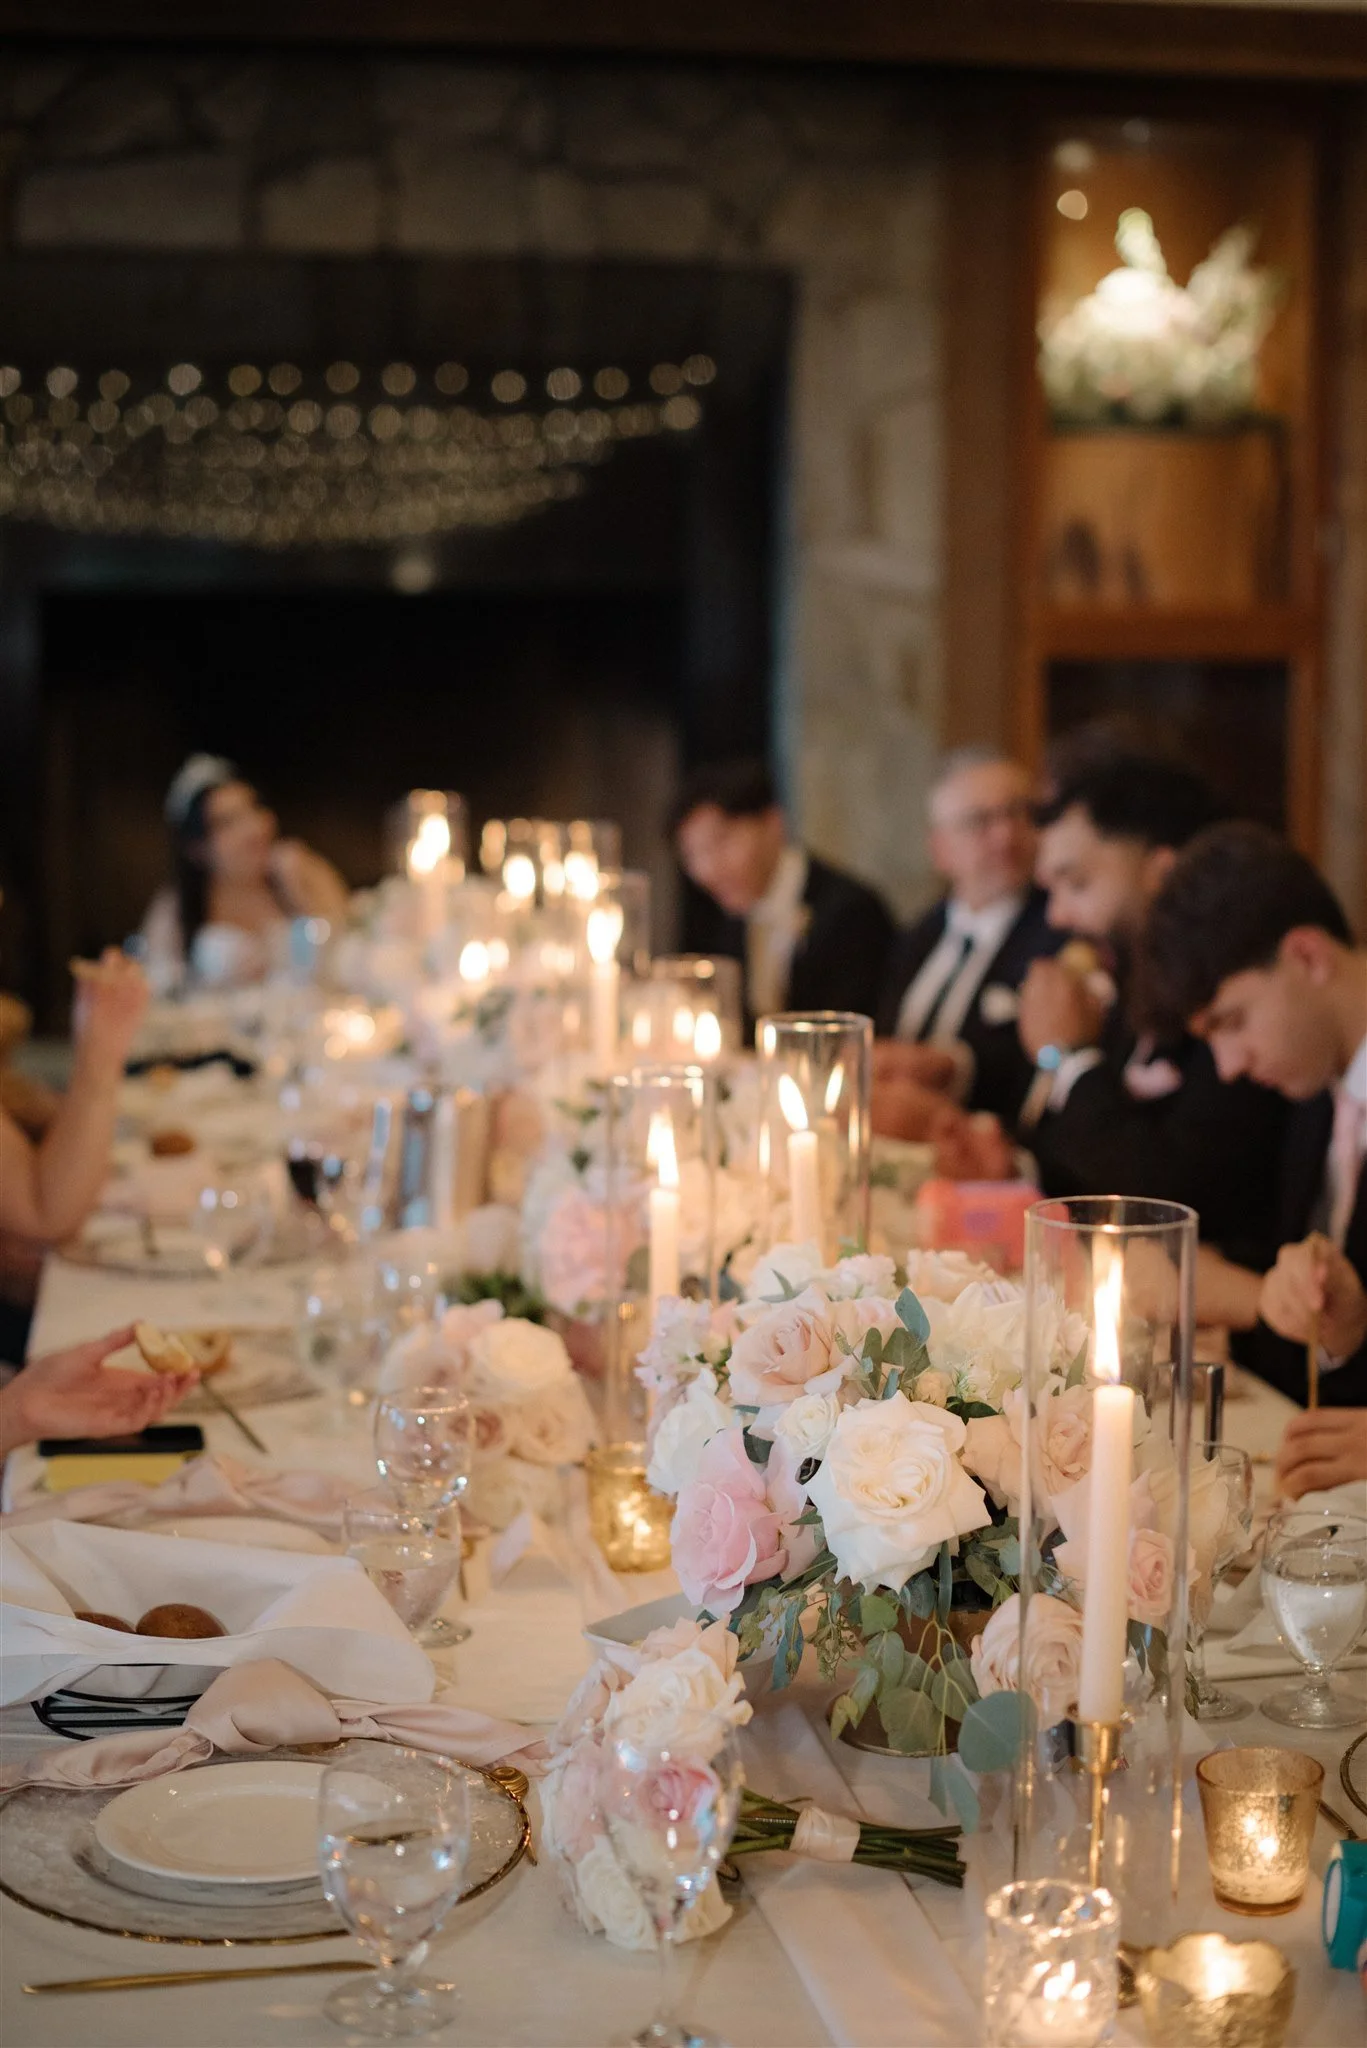
Centerpieces
Centerpieces can be a beautiful touch to your reception tables, but keep them low enough so guests can see each other (and so I can capture their reactions in photos!).

Your Seat
A sweetheart table makes it easier for me to capture photos of you throughout the reception—especially your reactions during speeches. It also allows your guests to see your expressions, and you’ll actually have a chance to eat without too many interruptions!
If you choose not to have a sweetheart table, make sure there’s a clear view in front of you (no tall centerpieces or people seated directly in front). This helps me capture great photos without obstructions.
Another thing to consider is where you’re seated so you can clearly see the speaker without craning your neck.
Cake Items
Some essentials that are often forgotten:
Cake knife & server
Cake stand
Plates and utensils for serving
A designated person to cut and plate the cake
Before the Wedding DaY
Iron or steam tablecloths a day or two before—some fabrics hold deep creases that are tough to remove. If you just bought them, soaking and tumble-drying can help. If you’re renting, check if they arrive pre-steamed.
SECTION NINE
CONSIDER LIGHTING
CONSIDER LIGHTING
Lighting plays a huge role in how your photos turn out! Natural light is always a great option, especially when it comes from the side at an angle rather than directly above or behind you. But beyond just looking good in photos, be mindful of where the sun or lighting is positioned so it doesn’t blind you or your guests. Here’s what to consider:
GETTING READY
If you have the choice between a window-filled space and a basement suite, go for the one with more natural light! It makes a big difference in both the look and feel of your photos.
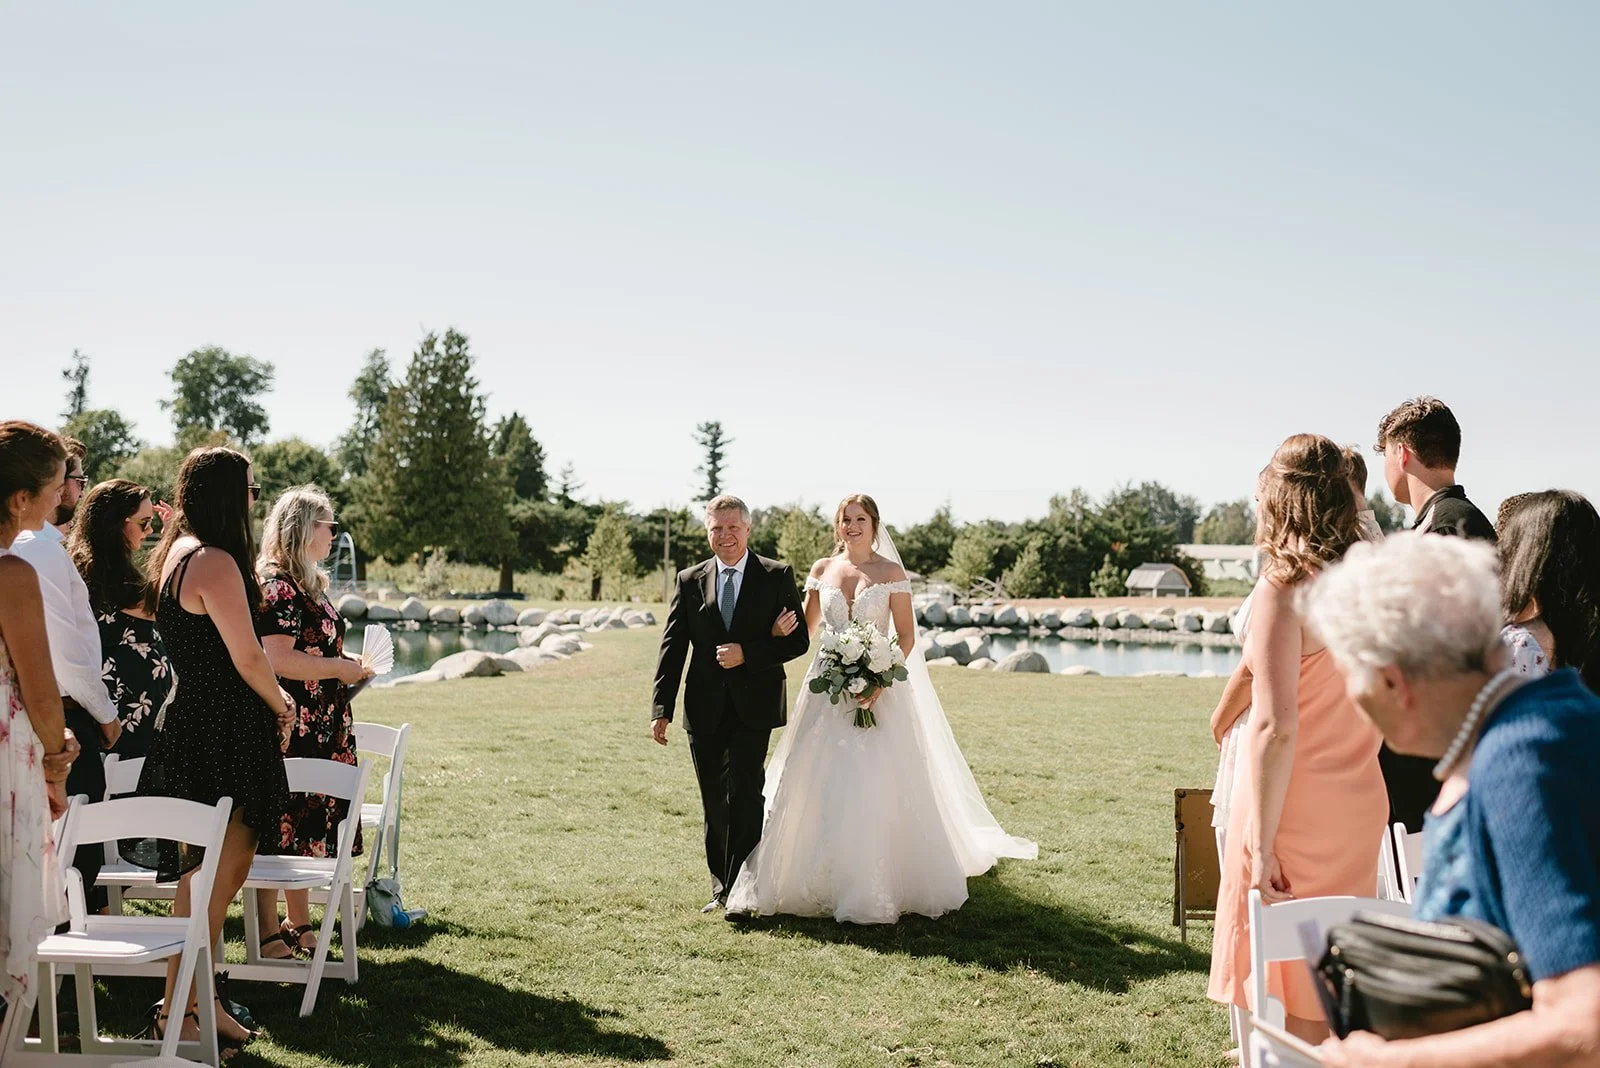
OUTDOOR CEREMONY
Think about where the sun will be at the time of your ceremony.
Closer to sunset = softer, more flattering light and usually cooler temperatures.
In an open field, position the sun behind and at an angle to the officiant for the best light on you and your guests.
If there are trees or objects casting shadows, try to schedule your ceremony when there will be minimal or no harsh shadows on your faces as you walk down the aisle or stand at the altar.
If you’re unsure about lighting at your venue or on your wedding date, ask me! I have an app that tracks the sun’s position so we can plan for the best lighting.
Not set on a date yet? Consider how the time of year affects sunset time and lighting conditions for your dream wedding!
Most importantly, avoid having the sun directly behind you at the altar—this can create harsh backlighting in photos and make it uncomfortable for your guests to look at you.

INDOOR CEREMONY & ALTER LIGHTING
If your ceremony is indoors, be mindful of overhead lighting, as it can create harsh shadows (hello, raccoon eyes!).
Consider which lights to turn on or off for a softer and more flattering look.
FAMILY PHOTOS
Natural and even lighting is ideal—all in shade or all in sun works best, rather than a mix of both.
YOUR SEATS AT THE RECEPTION
Avoid having a bright light or a setting sun directly behind you—this can create backlighting in photos and make it difficult for your guests to see you. This goes for the MC and speech-giver’s spot too!
SECTION TEN
BACKGROUND CONSIDERATIONS
BACKGROUND CONSIDERATIONS


A thoughtful setting enhances your photos. Be mindful of what’s behind key areas to avoid distractions:
GETTING READY
Choose a space with natural light and minimal clutter.
WELCOME TABLE AND DECOR
Keep backgrounds clean and free of unnecessary objects (like venue signage and decor).
RECEPTION SEATING
Ensure your sweetheart or head table has a visually appealing backdrop.
MC/SPEECHES
Consider what’s behind the speaker—exit signs, harsh sunlight, or venue-branded podiums might not match the vibe you want. If the sun will be bright at speech time, it could leave guests squinting instead of soaking in the moment.
EXTRAS
Final Tips for a
Seamless Wedding Day
1) Planning & Logistics
Venue
If you haven’t booked a venue yet, consider one that has both a ceremony and reception space to simplify planning and reduce travel time. Bonus points if it has beautiful photo spots, in-house catering, and décor to lighten your to-do list.
Wedding Coordinator
Even if it’s just a trusted friend acting as a day-of coordinator, having someone to manage logistics is invaluable. They’ll cue the wedding party during the ceremony, direct vendors, answer questions, and handle last-minute decisions, so you don’t have to! If you’re using a friend, be clear about your expectations. Let me know if you need guidance on what specifically to communicate for your wedding.
Party Bus
If you have a large wedding party or multiple locations, renting a party bus can keep everyone together, avoid parking issues, and make travel stress-free—plus, the party keeps going between stops! Be sure to schedule their arrival a little earlier than needed.
Rehearsal Dinner
Wedding days fly by! A rehearsal dinner lets your wedding party and family get familiar with the ceremony and offers a chance for more intimate speeches not scheduled for the wedding day.
2) Guests & Family Considerations
Out-of-Town Guests – If you have family and friends flying in, consider delaying your honeymoon by a day or two so you can spend time with them after the wedding. You’ll be busy leading up to the big day and might regret missing that extra time.
3) Decor
Reuse decor where possible
It keeps things looking cohesive while cutting down on costs. For example, aisle flowers can be repurposed as centerpieces and later gifted to guests at the end of the night!
Mirror signs
Pay attention to what they’ll be reflecting. If it’s not a blank wall, blue sky, or something uniform in color and pattern, the reflection may make the words difficult to read in person and in photos.
Seating chart
Arrange names alphabetically with their table number beside them. This prevents long lines and makes it easier for guests to find their seats.
Vendor Coordination
Connecting Vendors – If you don’t have a planner, connecting your vendors ahead of time ensures seamless coordination on the day. I’ll send you a questionnaire to gather vendor details so I can coordinate with them directly.
4) Photography-Related Tips
Florals
Hold your bouquet at your belly button to ensure the top of your dress is visible and avoid the “floating head” look in photos. Ask your florist for a manageable bouquet size—one that’s too large will tire out your arms quickly.
Posing & Candid Moments
The best candid moments happen naturally! Your job is to be present, enjoy your day, and focus on the people around you. I’ll guide you when needed, but most of the day, I’ll be capturing real moments as they unfold.
Brides – A slight bend in one leg adds a flattering shape to fitted dresses. If your dress has a slit, bend the leg closest to it. Also, consider how you want to style your hair—if you’re wearing it down, be mindful of whether you prefer it all in front, all in back, or some of each. Keeping hair off your shoulders typically looks best in photos.
Grooms – If in doubt, focus on your bride! Make her laugh, hold her hand, tuck one hand in your pocket, or simply be yourself.
At the end of the day, your wedding is about celebrating your love with the people who matter most. While these details help things run smoothly and make for beautiful photos, don’t stress over perfection—focus on being present, soaking it all in, and enjoying every moment. I’ll be there to capture it all, so you can relive the joy for years to come!